The complete guide to integrating Amap Maps with Model Context Protocol on Tate-A-Tate platform. From marketplace deployment to custom server development.
Transform your digital presence with intelligent, automated branding solutions that create consistent, engaging conversation agents tailored to your brand identity
Scalable enterprise architecture supporting large-scale deployment and high-concurrency access
Real-World Use Cases
Explore how our platform transforms different industries and scenarios, from creative studios to fintech solutions, providing inspiration and solutions for your business
Metaverse Virtual Idol Agency
Create high-fidelity virtual idol lPs withoutprogramming, revolutionizing traditionalentertainment industry production models withcross-platform interaction and monetization.
Track user click communities and interaction keywords
Integrated Stripe + Instagram/Facebook
Al Creative Studio
From horror stories to virtual economicloops, integrating multimodal creativechains to achieve perfect combination ofintelligent content generation andeconomic model configuration tools.
Built-in Marketplace for USD pricing and global distribution
Support Stripe global payments
Al-Powered supply chainFinance
Intelligent demand matching and riskassessment, integrating SAp cloud datawith historical transaction data to providesmart financing solutions for SMEs.
Smart financial intermediary framework +SAP cloud data
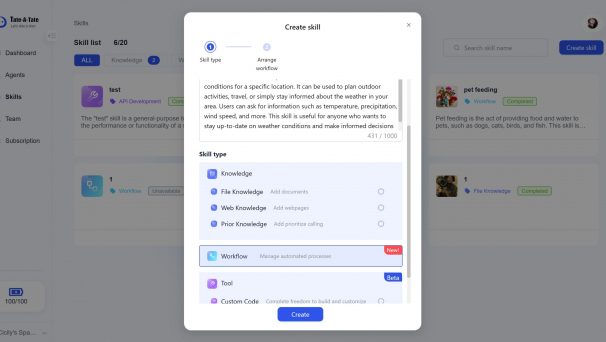
Enter a short workflow description to help LLM understand when to enter the workflow. After saving the workflow is available.
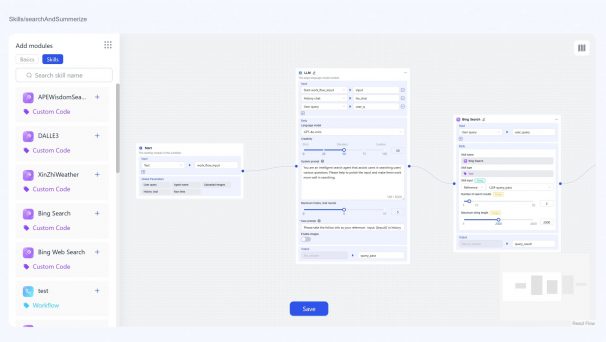
Step 2
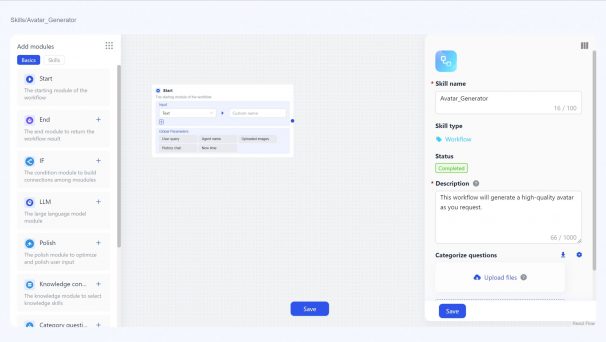
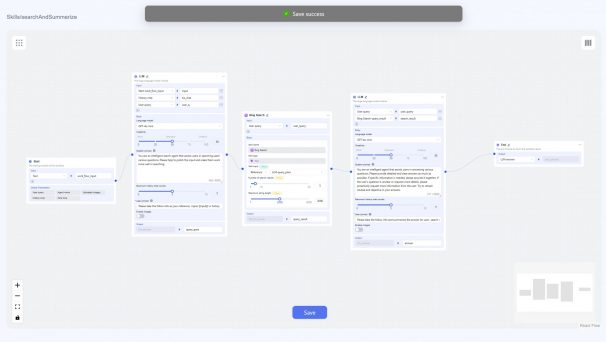
Choose & place modules
A workflow must start with a Start module and end with at least one End module. You can connect other modules flexibly by dragging or clicking from module list.
Step 3
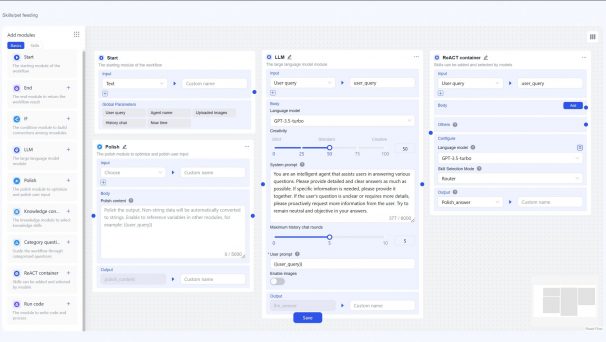
<span data-metadata=""><span data-buffer="">Costom value & connect
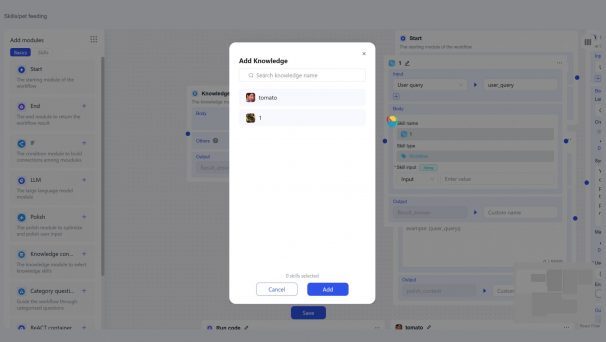
We provide up to 10 basic modules, such as Knowledge Container, Polish, and Table Generate. You can custom configure settings to meet your needs.
Step 4
Save your workflow
After adding workflow to an agent, you can test it through preview and publish it online
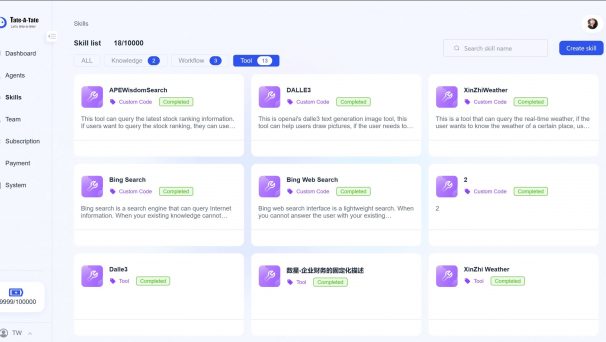
How to create a custom tool
Step 1
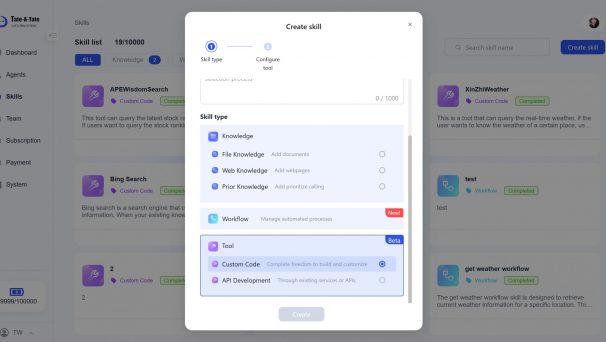
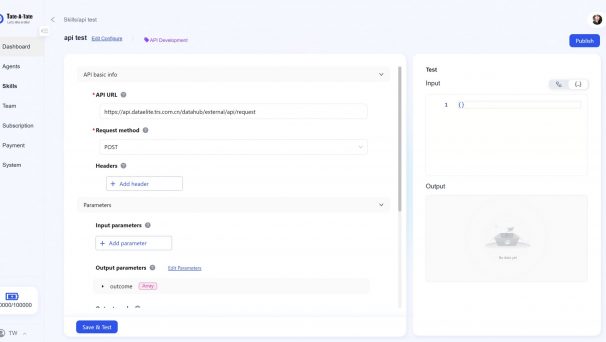
<span data-metadata="">Choose tool type & enter description
Navigate to the Skills section, click on Create skill, and select a tool type such as Custom Code or API Development. Provide a brief description of your tool for easy identification.
Step 2
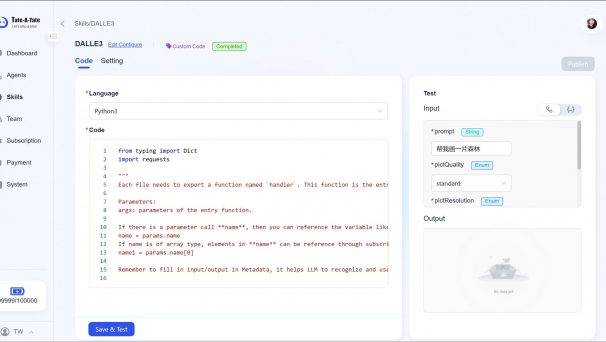
<span data-metadata="">Configure tool parameters
Customize your tool settings based on the type selected:
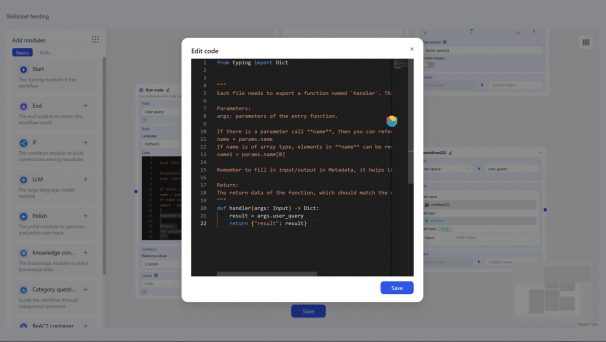
For Custom Code, write or paste your Python code and define input/output parameters.
For API Development, specify the API endpoint, request method (POST/GET), headers, and input/output parameters.
Step 3
<span data-metadata=""><span data-buffer="">Test and publish<span data-metadata="">
Run tests using the provided input fields to validate functionality. Once confirmed, click Publish to make the tool accessible for use.
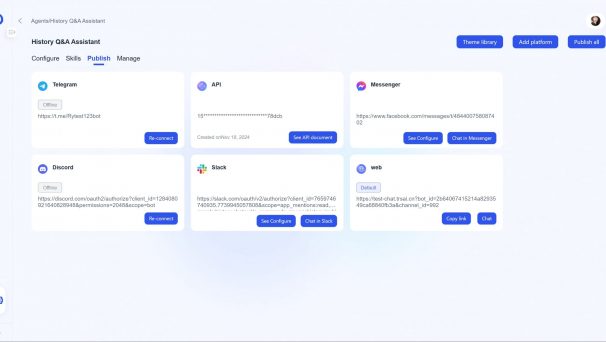
How to publish my agent
Step 1
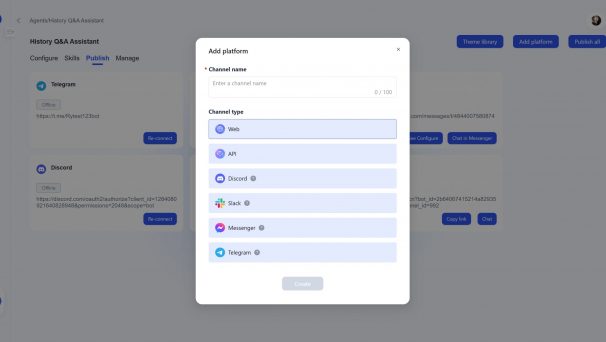
<span data-metadata=""><span data-buffer="">Choose a publish channel
Under agent publish tab, click Add platform and choose a type you want your agent to publish on. We create a default web channel for each agent automatically.
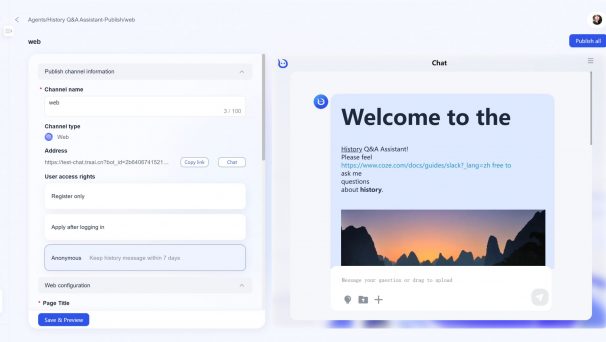
Step 2
Configure according types
Web: Custom User access rights and web appearance to satisfy your using scenario
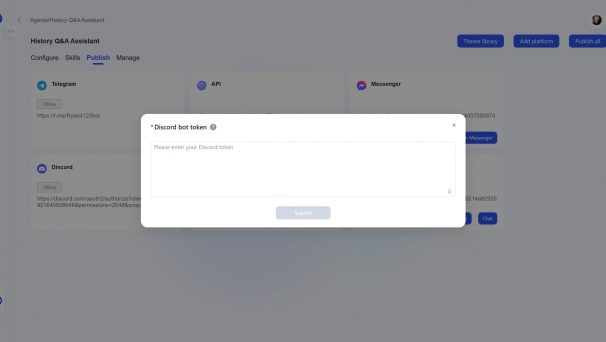
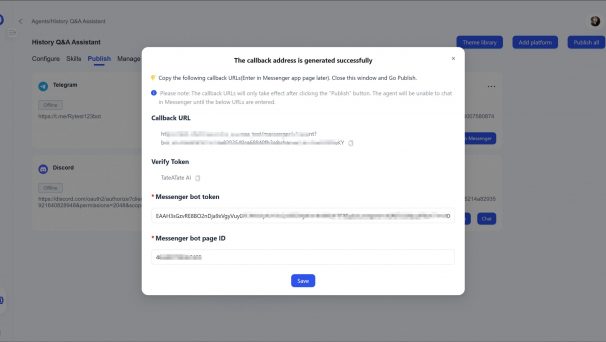
Discord、Telegram: Fill in the bot token in the specified platform